Dahlia Tuber Planting Instructions
STOP PLEASE READ
GROUND TEMPERATURE:
· If your ground temperature is ABOVE 60 degrees during the day and night: Okay to proceed with planting now.
· If your ground temperature is BELOW 60 degrees during the day and night: Keep everything in this box in a cool place BUT OPEN THE BOX FOR AIRFLOW, do not allow to freeze or get wet. Do not plant until the ground temperature is above 60 as noted above. Do you prefer to start the dahlias in a plastic container: You can proceed with planting but keeping them in a cool place (do not allow to freeze or get too wet). Once the tuber has rooted in the container you can then plant into the ground as a plant. Please open the tuber package for air flow
· Tubers may sprout before you get them planted. This is okay!
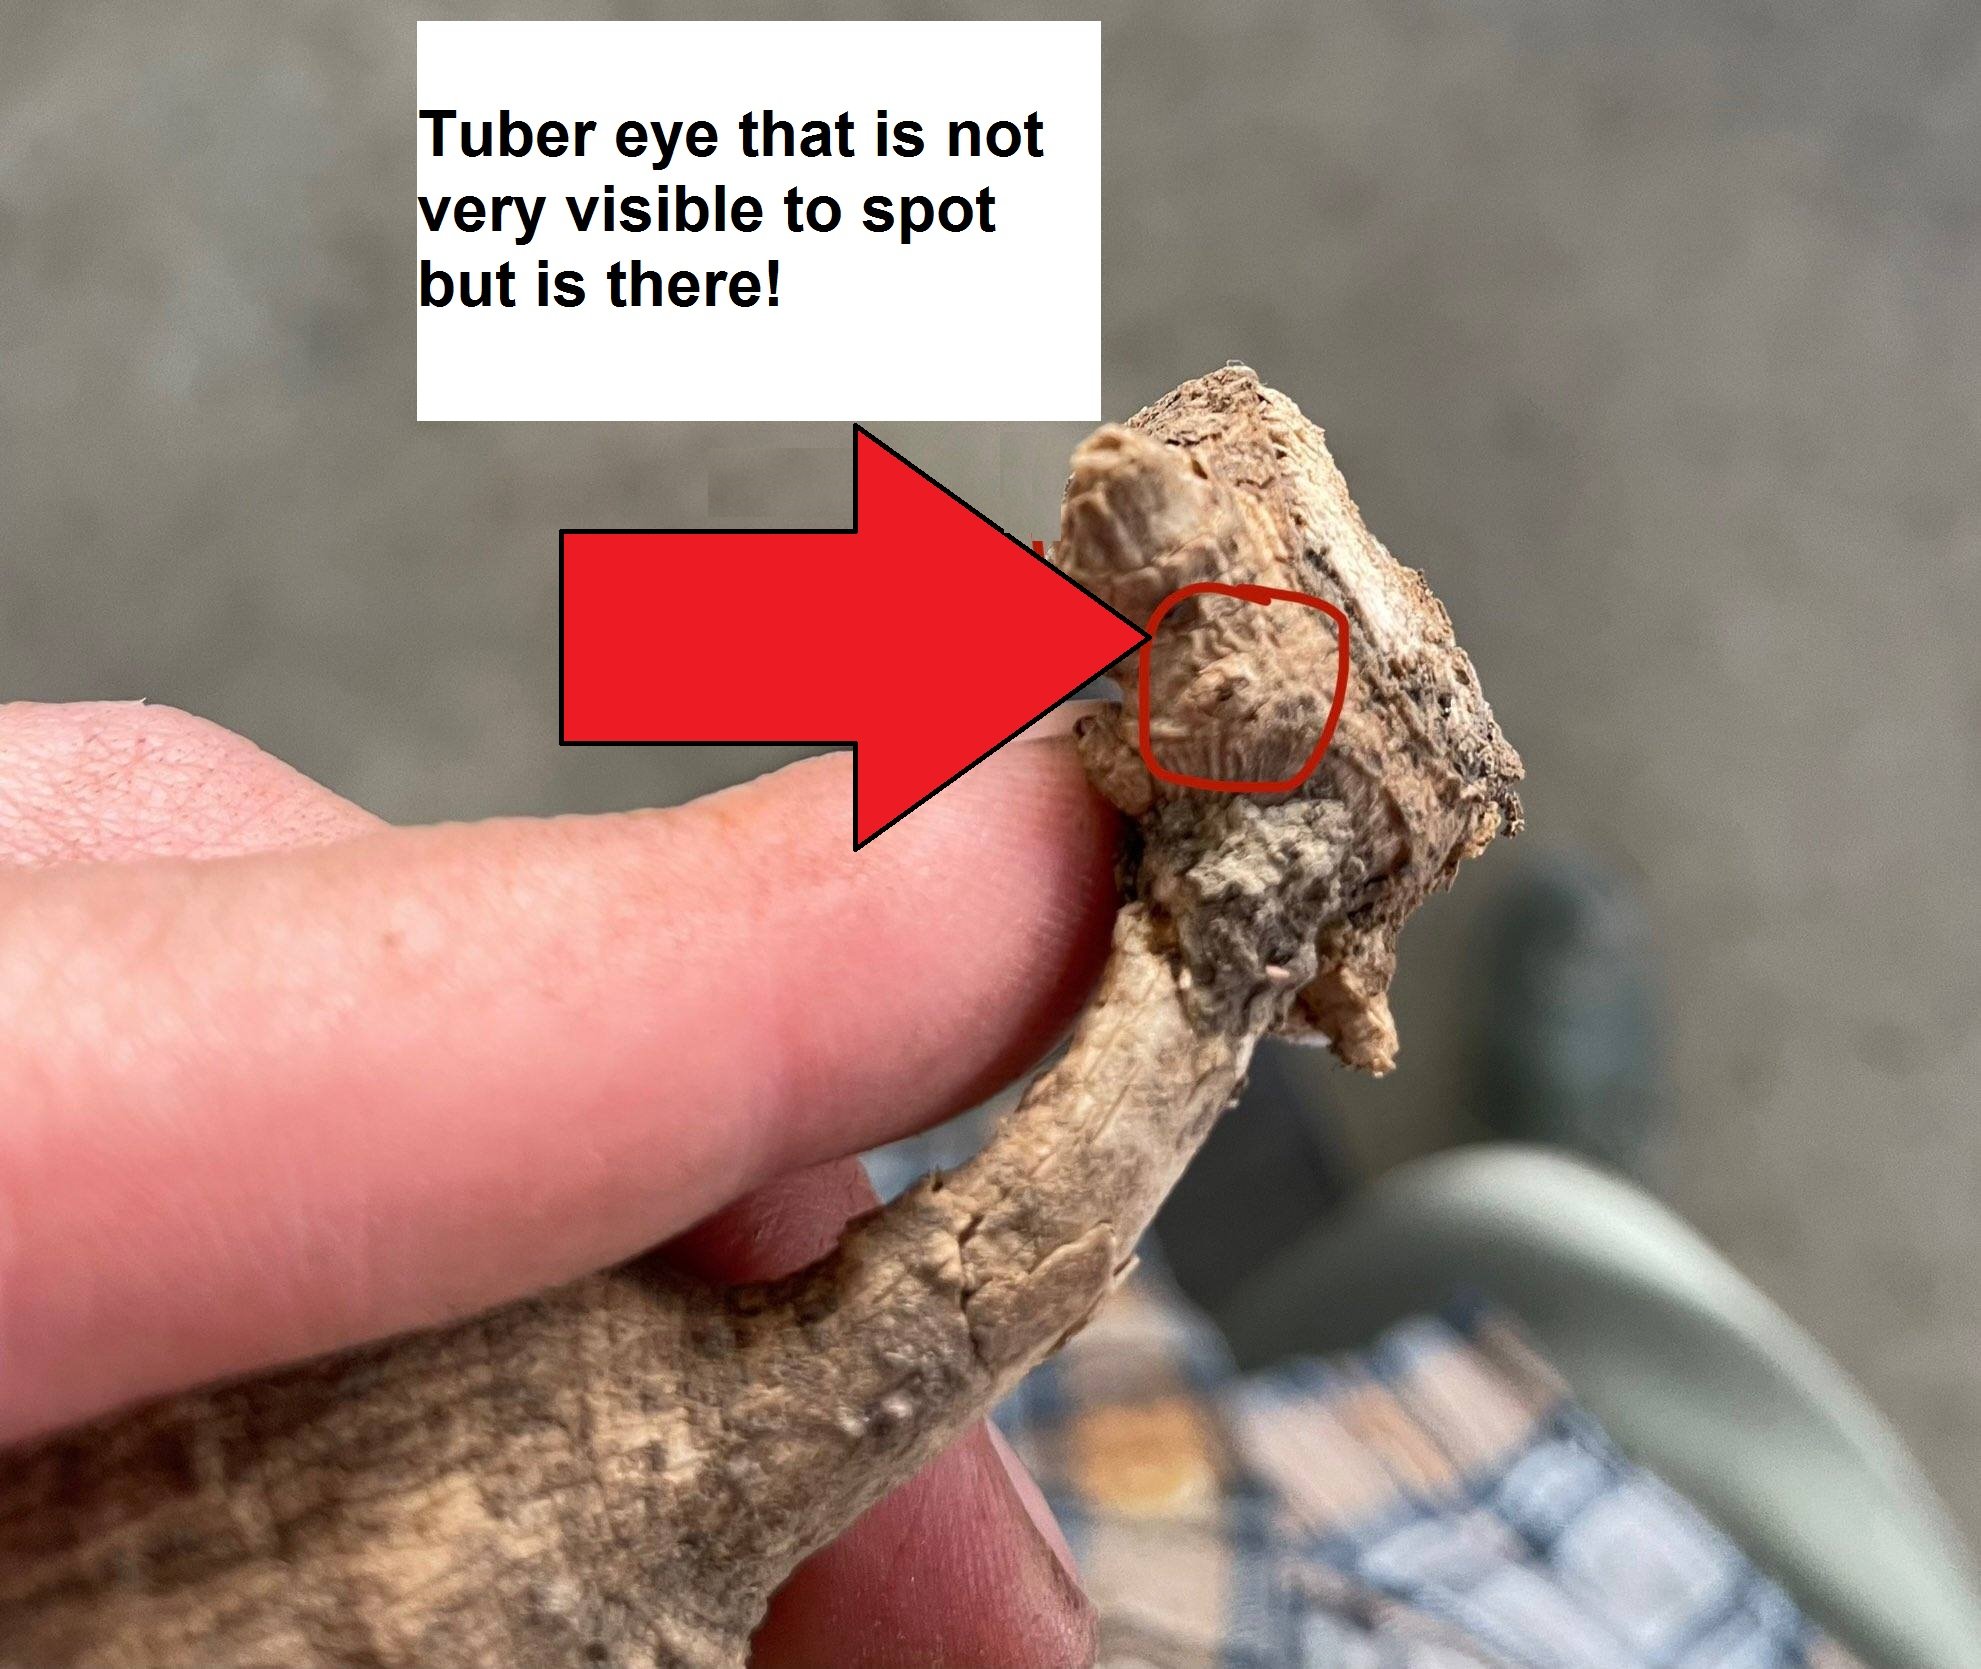
Tubers come in all sizes and shapes, they can be the size of a AA or AAA battery and be ready to plant with a good eye!
Planting Locations:
· Sunny area that has at least 8 hours of full sunshine
· If you are in a hot climate area: Find a location that has morning sun and afternoon shade
In- Ground Planting:
Planting Details
1. Space your tubers out 12-18 inches apart
2. Dig a hole that is 4-6 inches deep. Once you have the hole dug, mix a small handful of bone meal into the hole. Let's give your tuber the best start!
3. Place your tuber in the soil. Place the tuber on its side (horizontal) with the eye of the tuber facing up. Cover the tuber with soil, be careful of the eye.
4. It can take up to 4-5 weeks for the tuber to sprout once planted.
Pinching: Don’t forget to pinch your dahlias once the plant gets to 8-10” and have a few leaf sets. You will want to cut just above the first leaf set at the main stem.
Watering:
1. This is the hardest part. You will want to wait until the first set of leaves appear on the plant to water. Watering too soon or too much can rot the tuber.
2. Once the first set of leaves appears you will want to give the plant a heavy watering 3-4 times per week.
3. Overhead watering is not recommended. We recommend watering close to the plant/soil area or using a soaker hose.
4. Dahlias need to get enough water to reach 8-10" below the soil line. This is very important during the hot summer months.
5. Not enough water, they will not bloom. Too much water, they can rot. You will find a good balance!
Diseases & Pests:
1. Slugs: Yes, slugs will eat your dahlias. You will want to find a slug bait at your local garden center, Amazon, Home Depot to put down as well. This is typically a shake. This can be placed into the ground when you plant the tuber if you would like or sprinkle once it's established.
Fertilizer:
1. Fertilizer should be used throughout the season! Once a month would be enough until mid August. At this point, no need to fertilize any more for the season.
Growing in Containers:
1. Typically the ground is best but if you decide to grow in a container:
2. The container needs to be at least 16" wide x 16" deep.
3. Plant in a great mix of garden soil, potting soil and peat moss.
4. You will need to water more frequent ONCE they have sprouted. Too much water can rot the tubers.
5. Fertilizer should be used throughout the season!
SEE PHOTOS BELOW!
Do not toss any tubers away if any issues without contacting us with photos within 5 weeks of receiving your order.
Any questions please email us!
redtwigfarmsohio@gmail.com
We are here to answer any questions along the way!
WRINKLES/MOLD/STORING/PRESPROUTING, ETC
We have to say dahlia tubers are not pretty at all! They are ugly, they are wrinkly, they range in size depending on the variety. And at times you question if this will even grow anything. We have some varieties that smaller landscape plants that tubers are the size of an AA battery while others may be 3-4” long. No two tubers are alike.
We spend a lot of time doing quality control while bagging each tuber, before they are packed into the box and then one more check before sealing. We make sure that each tuber has a viable eye, when possible, good neck and from our past knowledge that we feel it will sprout and produce blooms. We have purchased our own field stock from various suppliers and some we were even like there is no way this will grow, and they did. Since each variety grows at different times, every once in a while, you may receive a tuber that doesn’t have a viable eye visible, it just means it’s still in dormancy and will take a bit longer to wake up.
Storing Tubers until ready to plant:
· We store all tubers in peat moss until we are ready to plant. Ours will be in peat moss until mid May when we plant into the ground here. Please open the box and you can open the individual bags so that they have air flow. You will want to store them in a cool, dark area. Not freezing 36-50 degrees. Checking on them periodically to make sure they haven’t had too much humidity. You can also pre-sprout them (instructions below)
Wrinkly/Soft Tubers:
· Tubers will be wrinkly, as mentioned above they are not pretty at all.
· If you press/squeeze the tuber and it has some soft give to it and it does not turn mushy, this tuber is good!
· During storage after dividing a tuber can lose some of its moisture, no matter how much we try to keep them hydrated, it will happen, this causes wrinkles. If you squeeze the tuber and it pushes through or is hollow. Please take photos and email us right away. We will work with you for a replacement or credit for that tuber.
Mold on Tubers:
· This happens all the time! If you see mold, we ask that you do the squeeze test again to make sure there is not mush inside. Mold will grow when there is too much humidity in the area the tubers are stored in. You can cut the mold off or wipe it off with hydrogen peroxide.
When you purchase from us, you get us along with your growing journey. We are here for all the questions, all the concerns. Once you plant the tuber, after 5-6 weeks if you have not seen anything sprout, we ask you to dig up the tuber and send us an email with photos. We will work with you to figure out what happened. We will work with you for a replacement or credit/refund.
If your ground is not above 60 degrees but you want to get these planted, you can pre-sprout them in a nursery container, fill with soil and follow the planting instruction process. (Again, reach out with any questions)